第2章 Before Getting Started
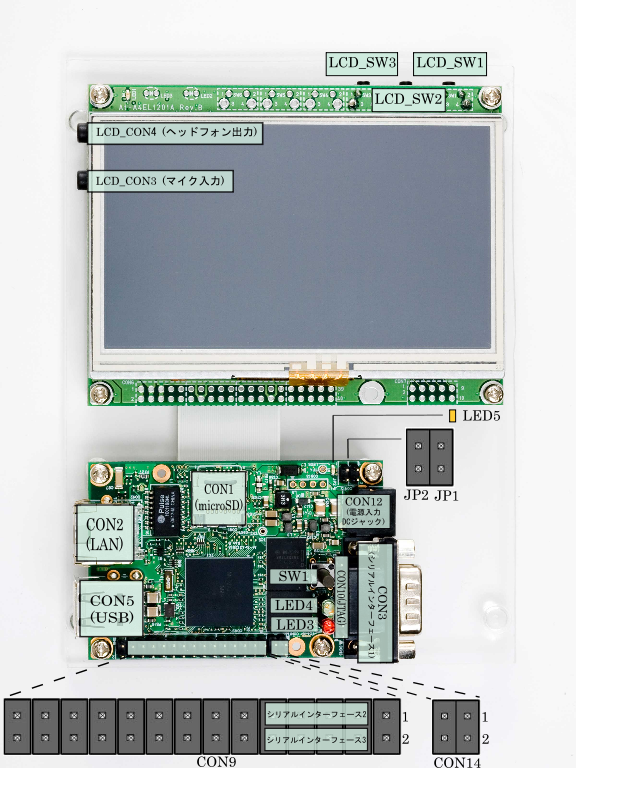
The layout diagram of the Armadillo-440 is shown below. Please make sure to confirm the position of each interface.
![[ティップ]](images/tip.png) | |
|---|
Serial Interfaces 2 and 3 have +3.3V I/O levels. They can be used at RS232C levels by connecting the RS232C level conversion adapter included in the Development Set. When using the RS232C level conversion adapter, please connect pin 1 (the yellow or green wire) to CON9 1 for Serial Interface 2 and to CON9 2 for Serial Interface 3. |
Please prepare the following items before using the Armadillo.
- Work PC and Serial Cross Cable
A PC that runs either Linux or Windows and has at least one serial port, and a D-Sub 9 pin (female-to-female) serial cross connection cable. Please install a serial console program[] on the work PC (software for Linux is contained in the tool directory on the included DVD).
- Network Environment
Please connect the Armadillo and Work PC so that they can communicate via a network.
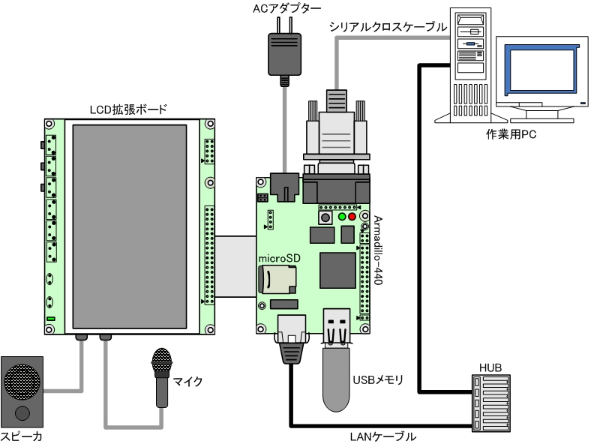
The following is an example of the Armadillo fully connected.
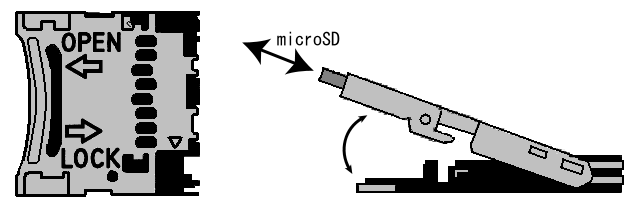
CON1 is a hinge type connector. The cover on the connector must be opened in order to insert and remove the card. When opening, the cover should first be unlocked by sliding the upper part of the connector horizontally in the direction shown by the OPEN arrow.
![[警告]](images/warning.png) | |
|---|
Please be aware that the connector may be damaged if excessive force is applied. |
2.4. Jumper Pin Configuration
There will be no need to change jumper pins other than JP2 in this document. Please leave JP1 in an open state. It will be noted when any change to JP2 is required. Set it to an open state now.
The position of the jumper pins can be seen in 図2.1「Layout Diagram」.
2.5. Serial Console Software Configuration
Start the serial console program and configure the connection as shown in 表2.1「Serial Communication Configuration」.
表2.1 Serial Communication Configuration
| Item | Configuration |
|---|
| Transmission Rate | 115,200bps |
| Data Length | 8bit |
| Stop Bit | 1bit |
| Parity | None |
| Flow Control | None |